LAB 2: BLUETOOTH
This lab delves into understanding Bluetooth connection between the Artemis microcontroller and a base station (AKA laptop), with some focus on data types for standardized communication between the Python code on the base station and the Arduino code on the Artemis.
Software Setup
These steps can be found in greater detail on the lab webpage; this is the sequence I followed:
- Install the ArduinoBLE library from the library manager
- Check Python version (3.9) and pip version (22.0, updated)
- Install the
virtualenvpackage and create the virtual environmentece4960_blein the desired directory - Download and unzip the provided lab code, start up the virtual environment and get going!
Initializing Bluetooth
We first burn the ble_arduino.ino sketch into the Artemis Nano. This allows us to see the MAC address of the Artemis, a unique hexadecimal code that identifies the device, on the serial monitor. I then loaded this address into the artemis_address field in connection.yaml, which allows the python code to connect to my Artemis Nano.

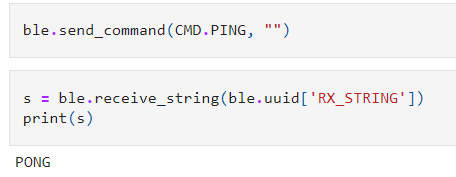
In this course, we will be using Jupyter notebooks to execute python code related to the robot. I started with the demo.ipynb notebook, which illustrates useful tools like logging capabilities, essential methods of the ArtemisBLEController, functions that access GATT characteristics from the Artemis and commands that can send and receive data to and from the Artemis.

Lab Task 1
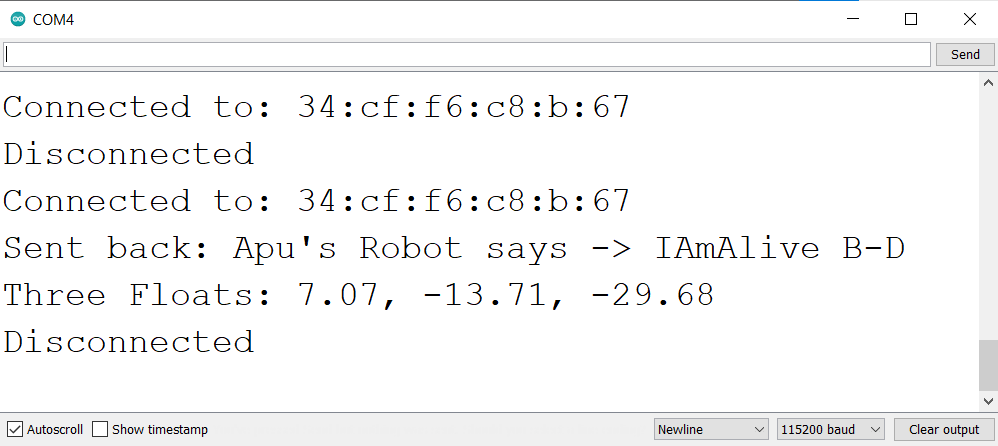
For this lab task, we want the Artemis to produce an “augmented ECHO” of a string issued by the base station. I used the provided CMD.ECHO from the Python interface to send an “IAmAlive” string to the Artemis Nano, with the ECHO command on the Artemis sending a “Apu’s Robot says -> IAmAlive B-D” to the laptop to show the augmented string obtained from the read GATT characteristic.
case ECHO:

        char char_arr[MAX_MSG_SIZE];

        // Extract the next value from the command string as a character array
        success = robot_cmd.get_next_value(char_arr);
        if (!success)
            return;

        /*
         * Added code to augment incoming 'ECHO' commands from computer
         */
        tx_estring_value.clear();
        tx_estring_value.append("Apu's Robot says -> ");
        tx_estring_value.append(char_arr);
        tx_estring_value.append(" B-D");
        tx_characteristic_string.writeValue(tx_estring_value.c_str());

        Serial.print("Sent back: ");
        Serial.println(tx_estring_value.c_str());

        break;

Lab Task 2
For this lab task, we want the Artemis to receive three float values sent by the base station and print them on the serial monitor. I used the structure of the SEND_TWO_INTS command to complete this task, keeping in mind that we wanted three float values instead of two int values to be printed on the serial monitor.
case SEND_THREE_FLOATS:
        /*
         * Added code to receive float values from the computer
         */
        float float_a, float_b, float_c;

        // Extract the next value from the command string as a float
        success = robot_cmd.get_next_value(float_a);
        if (!success)
            return;

        // Extract the next value from the command string as a float
        success = robot_cmd.get_next_value(float_b);
        if (!success)
            return;

        // Extract the next value from the command string as a float
        success = robot_cmd.get_next_value(float_c);
        if (!success)
            return;

        Serial.print("Three Floats: ");
        Serial.print(float_a);
        Serial.print(", ");
        Serial.print(float_b);
        Serial.print(", ");
        Serial.println(float_c);

        break;


Lab Task 3
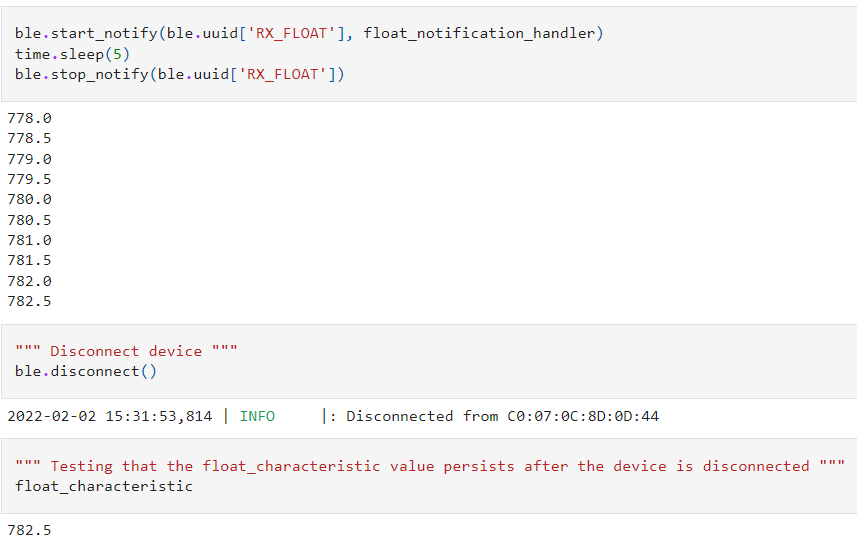
In this task, we want to mimic the functionality of receive_float in Python without calling the function every time to access the BLEFloatCharacteristic from the Artemis. On inspecting the code for the provided bluetooth modules, I found the bytearray_to_float function called by the receive_float method. This function retrieves the BLEFloatCharacteristic transmitted by the Artemis depending on the desired UUID (in this case, RX_FLOAT). I defined a global variable float_characteristic that is updated within a callback function, passing the function as input to the ble.start_notify and ble.stop_notify handlers.
float_characteristic = 0.0

def float_notification_handler(uuid, float_val):
    global float_characteristic
    float_characteristic = ble.bytearray_to_float(float_val)
    print(float_characteristic)

ble.start_notify(ble.uuid['RX_FLOAT'], float_notification_handler)
time.sleep(5)
ble.stop_notify(ble.uuid['RX_FLOAT'])

Lab Task 4
In the first approach, Python directly receives the float value as a byte array transmitted by the Artemis. In the second approach, Python receives the string as a byte array and converts each character to its corresponding value in the desired float.
Functionally, both methods have similar results - however, when considering the data consumption and efficiency, we see a clear difference. Computing with float values is more expensive than computing with strings - therefore, if we’re valuing speed over accuracy, we can reduce the precision of the float values and use strings instead. However, if we want increased granularity from our sensors, using float values is the way to go.
In addition, it is worth noting that the float data type on an Arduino has 32 bits for storing the desired value, giving us a range from -3.4E38 to 3.4E38 with a resolution of 10E-38. For the same bit width, a string can contain only 4 characters (each character is 8 bits), giving us a maximum resolution of .001 for our float value. This highlights the importance of the context of our values when deciding the appropriate data type.
References
The lab task writeup is here.
The Arduino sketch ble_arduino.ino can be found here.
The demo.ipynb notebook can be found here, while the notebook with all Lab 2 tasks can be found here.